Before beginning the installation process, you should ensure that your system meets the requirements stipulated in Section "Prerequisites".
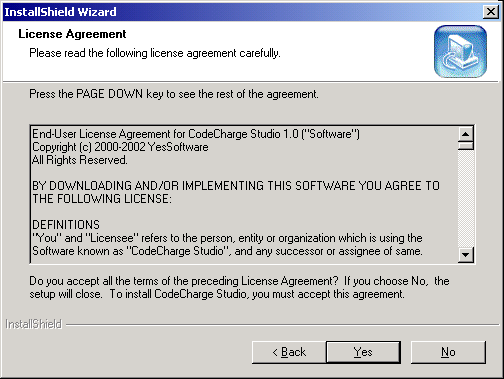
To begin the installation process, locate the CodeCharge Studio setup file and double-click on it. Before you can proceed with the installation process, you should read and agree to the License Agreement. Click on the Yes button to indicate your acceptance of the License Agreement and proceed to the next step.
In the next window, you are presented with fields to enter your name, company name, and serial number. If you don't have a serial number and want to take advantage of the 30 day trial period, simply enter Trial in the Serial Number field. Click Next to proceed.

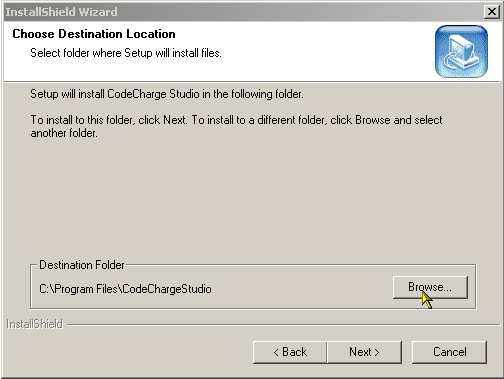
In the following window, confirm or specify the destination folder where you want CodeCharge Studio to be installed. The default recommended path for installing CodeCharge Studio is C:\Program Files\CodeCharge Studio. However, if you wish to change this path, click Browse and specify an alternate path. Once completed, click Next to proceed to the next step.
In the next window, you are presented with three setup options from which to choose. The Typical option installs all the CodeCharge options. The Compact option installs the CodeCharge application files but does not install the examples or Microsoft Jet 4.0. Finally, the Custom option allows you to select the specific components to be installed.

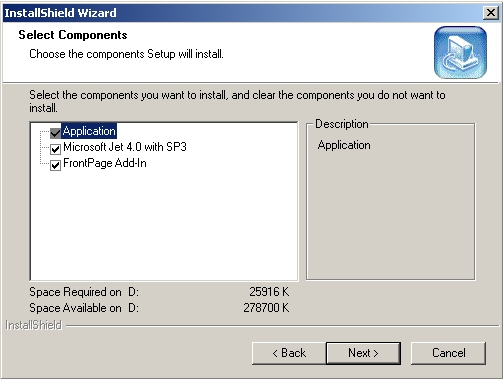
If you selected the Typical or Custom installation options, you are then presented with the window of Figure 3-5 that shows the components to be installed. You can then specify the components that you want installed.
After all the necessary files have been installed and configured, you will then be presented with the window of Figure 3-6 to confirm the success of the installation. If you have both CodeCharge and CodeCharge Studio installed on the same machine, you have a choice of deciding the default application to be used to open files with the (.ccs) extension. If only CodeCharge Studio is installed on the machine, you should associate the .ccs extension with CodeCharge Studio.
At this point, if you want to launch CodeCharge Studio, you can select the Launch CodeCharge Studio checkbox then click on the Finish button to complete the installation process.

If you installed CodeCharge Studio in trial mode, you have 30 days during which to evaluate the fully functional software. When you launch the software, a flash screen will show the number of days remaining for the evaluation. The screen will also have four buttons, one of which will be the Try button. Click on this button to start using the software in trial mode.
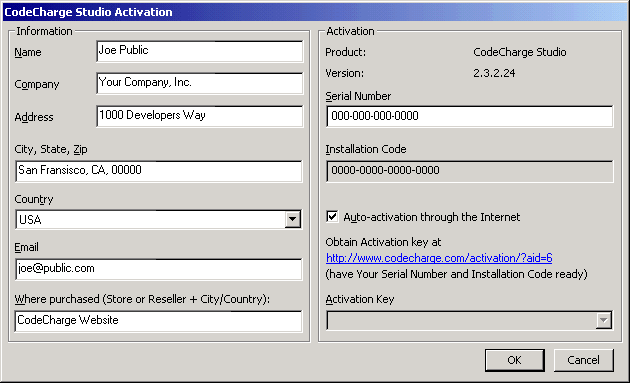
On the same flash screen, there will also be an Activation button that can be used to activate the software using a valid serial number. This can be done by entering the serial number directly into the activation window. Alternatively, you can use a browser to navigate to the web address indicated in the activation window. Use your Serial Number and Installation Code to acquire an activation key. Once received, enter the key into the Activation Key field. Click OK to complete activation.