The Record Builder can be used to automate the process of creating record forms where database content can be inserted, edited or deleted. To begin the process, click on the Record Builder option in the Builders tab.
Select or create a database connection from where the data to be edited or added using the record form is stored. You can select one of the existing database connections, create a new connection or select one of the sample databases.
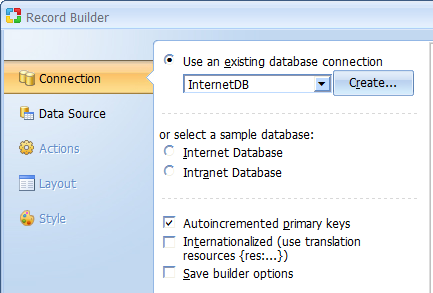
Click Next to proceed to step 2.
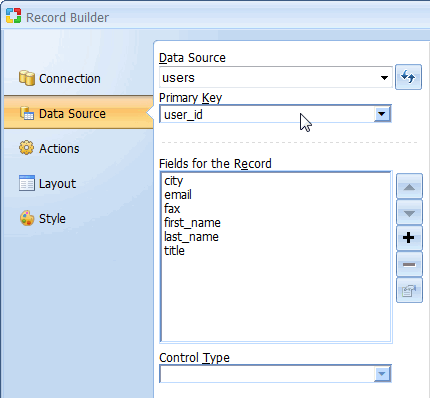
Select a data source and the fields to be included in the record form.
| Parameter | Description |
|---|---|
| Data Source | Select the table to use as the data source. |
| Primary Key | Select the primary key field in the table. |
| Available Fields | This list-box shows all the fields available in the table. |
 |
Refreshes the connection if you make changes to the database while using the builder. |
 |
Select a form field then click this button to move it upwards in the order of appearance. |
 |
Select a form field then click this button to move it downwards in the order of appearance. |
 |
Click this button to add it some fields to the form. |
 |
Select a form field then click this button to remove it from the form. |
 |
Opens the dialog with advanced properties. To activate the button select a field in the Fields for the Record section.
Note: The following field types have advanced properties: CheckBox List, ListBox, Radio Button, Link and Image Link. CheckBox List, ListBox or Radio Button - Clicking on the button will open the 'List DataSourse' dialog illustrated below. Link and Image Link - Clicking on the button will open the dialog with link properties. |
| Control Type | Specify the control type to be used for each of the fields in the form. |
Click Next to proceed to step 3.
Set the functionality that will be available in the record form. You can uncheck any of the options if you don't want the form to have the corresponding functionality.
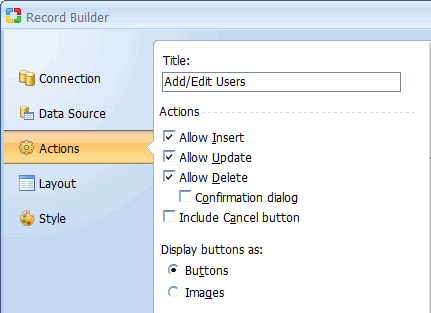
Click Next to proceed to step 4.
| Parameter | Description |
|---|---|
| Add template panel | Insert Record inside Template Panel. This option available only on pages with Designs. Read more... |
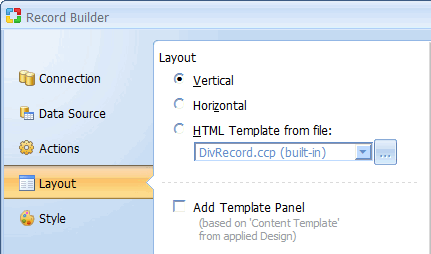
Click Next to proceed to step 5.
Select a style to be used to display the record form. The preview portion of the window shows how the final form will look with the selected style.
Click on the Finish button to close the builder and generate the form.